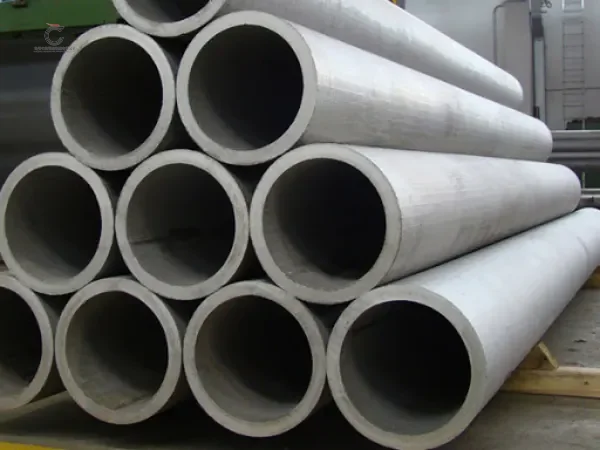
Seamless steel pipe identification and inspection
Seamless steel pipe identification
1.shoddy seamless steel pipe is easy to scratch, the reason is that shoddy seamless steel pipe manufacturer equipment is rudimentary, easy to produce burrs, scratch the surface of the steel. Deep scratches reduce the strength of the steel.
2.The shoddy seamless steel pipe has no metallic luster and is light red or similar to the color of pig iron.
3.The crossbars of shoddy seamless steel pipes are thin and low, and often appear to be not filled with enough, because the manufacturers press down the first few passes of the finished products to achieve large negative tolerances, and the iron type is small, and the hole type is not filled with enough.
4.The cross-section of the shoddy seamless steel pipe is oval because the manufacturer, in order to save materials, presses down the first two passes of the finished rolls to a large extent, and the strength of this seamless steel pipe is greatly reduced, and it also does not meet the standard of seamless steel pipe size.
5.The composition of high-quality seamless steel pipe is uniform, the tonnage of cold shear is high, and the end face of cutting head is smooth and neat, while the end face of cutting head of shoddy seamless steel pipe often has the phenomenon of flesh loss due to poor material, i.e. unevenness and no metallic luster. And because of the shoddy manufacturer's product cutting head less, the head and tail will appear large ears.
6.The shoddy seamless steel pipe material contains many impurities, the density of steel is small, and the size is super poor, so in the absence of vernier calipers, it can be weighed for verification. Generally speaking, the whole phase weighing effect will be better, mainly taking into account the cumulative error and probability theory of this problem.

Seamless steel pipe inspection
1.Seamless steel pipe geometric size and shape inspection
①Seamless steel pipe end bevel angle and blunt edge inspection: angle ruler, cardboard.
② seamless steel pipe curvature check: straightedge, horizontal ruler (1m), stopper, fine line measurement per meter curvature, full-length curvature.
③Seamless steel pipe length check: steel tape measure, manual, automatic length measurement.
④Seamless steel pipe outside diameter, ellipticity check: caliper, vernier caliper, ring gauge, measuring the maximum point, the minimum point.
⑤ seamless steel pipe wall thickness inspection: micrometer, ultrasonic thickness gauge, not less than 8 points at both ends and record.
2.Seamless steel pipe chemical composition analysis
chemical analysis method, instrumental analysis method (infrared C-S instrument, direct reading spectrometer, zcP, etc.).
①N-0 instrument: gas content analysis N, O
②Direct reading spectrometer: C, Si, Mn, P, S, Cr, Mo, Ni, Cn, A1, W, V, Ti, B, Nb, As, Sn, Sb, Pb, Bi in block specimens
③Infrared C-S instrument: analysis of C and S elements in iron alloys, steelmaking raw materials, steel.
3.Seamless steel pipe physical and chemical properties test
① Seamless steel pipe hardness test: Brinell hardness HB, Rockwell hardness HRC, Vickers hardness HV, etc.
Note: specimen elongation after fracture and specimen size GB/T 1760
② seamless steel pipe impact test: CVN, notch C, V, work J value J/cm2
Standard specimen 10 × 10 × 55 (mm) Non-standard specimen 5 × 10 × 55 (mm)
③ seamless steel pipe tensile test: measure stress and deformation, determine the strength of the material (YS, TS) and plasticity indicators (A, Z) longitudinal, transverse specimens pipe section, arc, circular specimens (¢10, ¢12.5) diameter, thin wall large diameter, thick wall fixed scale distance.
④ hydraulic test: test pressure, steady pressure time, p = 2Sδ / D
4.Seamless steel pipe surface quality inspection(100%)
① manual visual inspection: lighting conditions, standards, experience, markings, steel pipe rotation.
② nondestructive testing inspection:
a. Eddy current flaw detection ET: (electromagnetic induction)
Mainly sensitive to point-like (hole-shaped) defects. Standard: GB/T 7735-2004 Level: B grade
b.Ultrasonic flaw detection UT:
For a variety of material uniformity of the material surface and internal crack defects are more sensitive.
Standard: GB/T 5777-1996 Level: C5
c. Magnetic particle MT and leakage magnetic flaw detection: magnetic flaw detection, applicable to the detection of surface and near-surface defects of ferromagnetic materials.
Standard: GB/T 12606-1999 Level: C4
d. Electromagnetic ultrasonic flaw detection:
Does not need coupling medium, can be applied to high temperature and high speed, rough steel pipe surface flaw detection.
e. Penetration flaw detection:
Fluorescence, coloring, detection of steel pipe surface defects.
Cangzhou Shenlong Pipe Manufacturing Co., Ltd. is a company specialized in the production, processing and sales of various steel pipes and pipe fittings enterprise, the production base is located in Cangzhou in Hebei. Founded in 1992, covering more than 60,000 square meters, more than 200 employees (including 30 inspectors), annual output of around 150,000 tons of steel pipes, and 40,000 tons pipe fittings. Its products are exported to the Middle East, Europe,Africa America and other countries, which are widely used in oil exploit,chemical industry, water conservancy, architecture and other fields.


